For our date night, Big T and I signed up for a Primitive Archery class at Last Resort Guns, a local range right down the road. Big T goes there to practice sometimes, and he also teaches the NRA Beginner’s Handgun class there occasionally. Russ Durling, the CEO, was our instructor. Russ is retired RAF and has a wonderful sense of humor. He is also quite knowledgeable about bows (and weapons in general). Plus, I must note that he has a lovely British accent.
The goal of the class was to make a longbow and three arrows and then learn to use them. For information regarding the English longbow from Wikipedia, click here.
Our class was comprised of six students. Besides the two of us, there was a mum and
her two daughters and another lady. We
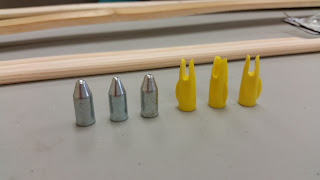
began by choosing the colors of our bow string, fletches, and nocks. Fletches are the feathers for the arrows, and
nocks are the pieces on the end of the arrow that notch into the bow string. My fletches were blue-white-blue, my nocks
were yellow, and the bowstring was black.
Our first task was to make our arrows. We were given dowels that had been “sharpened” sort of, on each end, but not to a point. Using an ancient secret adhesive, Super Glue, we first attached the nocks to each arrow on the more pointy end.
Then using the same ancient adhesive, we attached the
pointers on the other end and gently tapped them with a hammer.
My most challenging part was next –
attaching the fletches. Using two
popsicle sticks to hold the fletch, we added three small dots of the glue on
the rib of the fletch and then placed it on the arrow, lining up with the
little bump on the nock.
After we had one fletch on each arrow, then a guide was used to mark two more spots 120 degrees apart so that the fletches were equally spaced on the arrow. After all of the fletches were glued on, then we ran a bead of glue down each one to make them stay put. Then we set the arrows aside to dry completely while we worked on the bows.
After we had one fletch on each arrow, then a guide was used to mark two more spots 120 degrees apart so that the fletches were equally spaced on the arrow. After all of the fletches were glued on, then we ran a bead of glue down each one to make them stay put. Then we set the arrows aside to dry completely while we worked on the bows.
We were all issued two pieces of
bamboo, for the bow and the backer.
First we sanded them so that they had smooth edges on the side so that
we didn’t get any splinters and so that our bowstrings wouldn’t be cut by a
jagged edge in the notches.
Next we found the center of both pieces and lined up the centers and tied the two pieces together with leather string on each end with a flat knot.
Next we found the center of both pieces and lined up the centers and tied the two pieces together with leather string on each end with a flat knot.
Now we had to choose a piece of
leather about 5”x8” to wrap around the middle for our grip. This was also secured with a longer piece of
leather lace.
And to make it very secure, two more leather laces were added between the grip and the other tie points. Then we added a highly technical piece, a coffee stirrer,(see above) as an arrow rest.
And to make it very secure, two more leather laces were added between the grip and the other tie points. Then we added a highly technical piece, a coffee stirrer,(see above) as an arrow rest.
Lastly, we added the
bowstrings. First we made a loop and attached one end, then Russ showed us
how to determine the length by placing the bow between his feet and behind his left knee. He then bent it
to an arch to where the bow string would be approx. 13” from the arch.
Then the string was looped for the other end. And tada – our bows were finished!
Then the string was looped for the other end. And tada – our bows were finished!
We are now ready to go to the
range and put them to use.
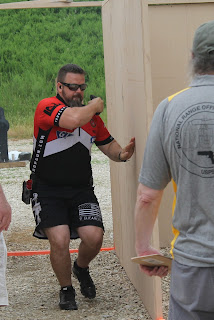
Big T had a huge advantage over
me, as that he has used a bow before when bow-hunting. You can see here that he
has a good stance.
I had never even picked a bow up that I could remember, but with some
good instruction, I was able to hit the
target after a few tries at the 5 yard mark.
I didn’t realize that you are supposed to hold the bow at a 10 degree
angle; I always thought that it was held straight up and down. I also learned that the more I thought about
the shot, the worse it was. I did have
to keep reminding myself: “Elbow down”, “thumb
on cheek”, and “breathe”. At one point,
I was running through scenes from “Princess Diaries 2”, “Hunger Games”, and “Lord of the Rings” in my mind, trying to
figure out what to do to correct my shots. I was glad that my shooting wasn't determining my fate or my dinner.
Russ decided that he would challenge us a little and moved my target and Big T’s target to a distance of 15-20 yards. I personally believe he over-estimated my skills, but after a few shots at that distance, he put up new targets. My first shot was a bullseye!
I freaked out! Of course, I couldn’t repeat that. But it was still cool.
For our last couple of rounds, he let us choose zombie or alien targets. I got an alien target. On the very last round, I was able to get three arrows to stay in the target instead of go through it for a very funny picture. Yay!!


